skip to main |
skip to sidebar
 For Valentine's Day I gave Dave a few odds and ends--some books, a VHS copy of The Year Punk Broke (I don't know why it's not available on DVD!), and a tin of Jacques Torres hot chocolate. I made the valentine with a blank postcard and some wood blocks (those are really getting a lot of traction lately--see the T-shirt project), with a paper heart garland to decorate the wrapping.
 Dave gave me some chocolates and this necklace I had wanted from Les Morceaux. He also brought carrot cake from Lloyd's and we enjoyed the evening re-watching Freaks and Geeks.
 Over the weekend I completed a few more scrap paper notebooks. But more importantly, I used my new Print Gocco for the first time to decorate them. I've been a bit of a shut-in lately because of the cold and am already starting to wish the warmer weather would come back so I can get out and start exploring again. Thus, I decided to go for a travel theme, and printed out part of an old Texas roadmap.
 Overall the process was pretty easy, though it did take me quite a few tries before getting a decent print. At first I was pushing down too hard (see the print on the right)--turns out you barely have to tap it down to get the right amount of definition. At least in my experience. I think I generally picked a trickier image than I should have--there's way too much detail in there, plus I had a hard time getting the whole image to print. Although I do kind of like how there are spots missing where there wasn't enough ink on the screen--which I guess is technically a mistake and might not work for other images.While the general process of making screens and prints with the Gocco is very simple and quick, I was a little disappointed to learn how fast you burn through the supplies. The bulbs can only be used once--after making one screen they go into the trash. The screens can be reused to make additional prints, but only to a point since the frames are made of paper and don't last too long. And unlike regular screens you can't erase them to create a new image. To make matters worse, because the product has been discontinued, the replacement supplies, while easy enough to find online, are rather expensive.
Someone needs to start manufacturing new supplies that can be used on the existing machines. I'm surprised it hasn't happened already! But for now I'll just have to be very careful and strategic with what I already have.
The next phase of this project was a bit delayed because I couldn't find any sewing needles (the craft room needed a serious cleaning, which it has received). I was finally able to proceed over the weekend, which entailed sewing various road trip routes inside the outlines of the U.S. I got the idea after my Arizona road trip, when I thought to just do the states of Nevada and Arizona. Then I thought, why not do the whole country, which opened it up to many more possibilities, of crazy imagined routes that no one in their right mind would try, to documenting road trips from literature and film. From left to right: Salt Lake City, UT, to Fargo, ND, to Louisville, KY, to Portland, ME; Los Angeles, CA, to Detroit, MI, to Mobile, AL; New York, NY, to Austin, TX
 From left to right: Butte, MT, to Chicago, IL, to Washington, DC*; New York, NY, to San Francisco, CA; Bisbee, AZ, to Tulsa, OK, to Savannah, GA
 I've only actually driven one of these routes: New York to Austin (on the right here). The rest of them were chosen for either purely aesthetic value, routes I'd like to try, or literary reference. I did type all of them into Google maps in an attempt to stitch the actual route that would be taken, though all of them are rough estimates, since it's kind of difficult to tell where anything is without the outlines of states in the design. I think I did a fairly good job though.
*This is the route that T.S. Spivet traveled in The Selected Works of T.S. Spivet, which I read recently. It might not be totally accurate, as I didn't check back to see how the rails traveled from Butte to Chicago, but you get the gist.
Lately I've been experimenting a bit with using paper doilies as stencils. I haven't exactly perfected the art yet but I've been pleased with the preliminary results and thought I'd share. I'm pretty excited about this (although not as much about the unflattering picture). That's not white ink, it's bleach. I tested out an old black T-shirt, painting bleach over the doily with a cheap paint brush.
 It's a little sloppy (I have to make sure all of the holes are punched out of the doily before starting) but it worked better than expected.
 I also tried out printing with fabric ink, and the resulting image is a bit crisper than the bleach, though it could still use a bit of perfecting. In the future I'll cut out a circle slightly larger than the doily so the edges are nice and clean.
 I went ahead and cut out a long rectangle of gray T-shirt fabric to make a lightweight spring scarf, and tried different things as I went along--cutting shapes out of the doily, only printing part of the doily, etc.
 Looks pretty good, I think. (Yes, I'm all doilied out, in my scarf and T-shirt.)
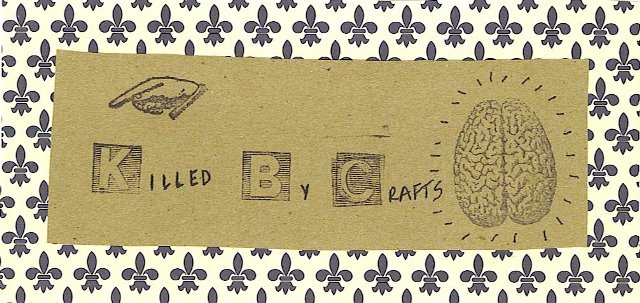
 For Valentine's Day I gave Dave a few odds and ends--some books, a VHS copy of The Year Punk Broke (I don't know why it's not available on DVD!), and a tin of Jacques Torres hot chocolate. I made the valentine with a blank postcard and some wood blocks (those are really getting a lot of traction lately--see the T-shirt project), with a paper heart garland to decorate the wrapping.
 Dave gave me some chocolates and this necklace I had wanted from Les Morceaux. He also brought carrot cake from Lloyd's and we enjoyed the evening re-watching Freaks and Geeks.


 Posts


